
Home > Archive > Recipes & articles > Quick start
![]()
![]()
Aliah Chowdhury is a freelance technical writer based in the UK.
![]()
![]()
SpicyNodes provides an intuitive, inviting way to create and customize nodemaps to suit your every need. This is a quick guide on how to get up and running.
![]()
Before making nodemaps, it’s important to get acquainted with SpicyNodes’ terminology.
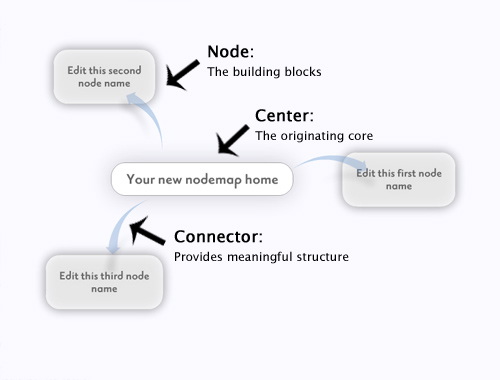
- Node: Each node represents a block of information. These are the building blocks of a nodemap.
- Connector: Connectors provide meaningful relationships between nodes and provide structure to the nodemap.
- Center: A center is where your viewers have focused their attention. It can contain extra text, images, and video, and other nodes branch out from it.
Right now, this all we need. Let’s move on to creating our nodemap.
![]()
SpicyNodes offers two choices: free community memberships that fulfill the needs of most people, and paid memberships for those who desire additional features and control. Let’s start with the free version. Once you’re logged in, you see the SpicyNodes equivalent of a dashboard. Here, you can create new nodemaps, update and customize existing nodemaps, view traffic information about the nodemaps you’ve created, and much more.
Once you are logged in, from your home page, click "Create new nodemap" to get started.
![]()
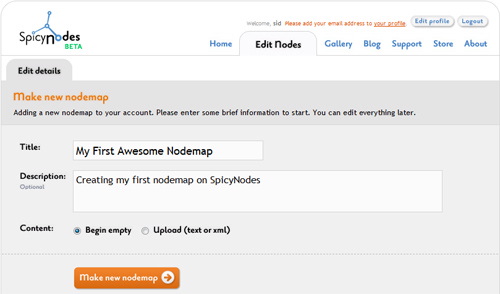
You’ll see the first of the wizards you need to get your sitemap online. Here, just fill in the title and description you’d like to use. For the third option, select "Begin empty" since you’re creating a new nodemap.
![]()
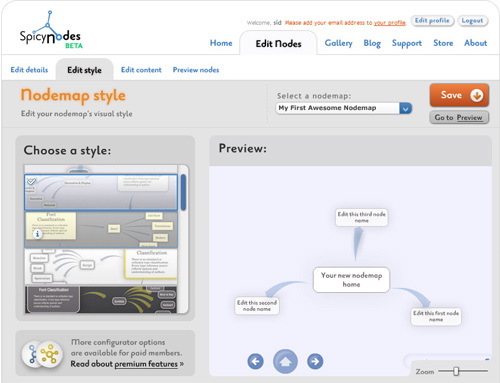
Next, you can choose the visual presentation of your sitemap. On the left pane, are a number of predefined styles or themes. A style completely changes the look and feel of a nodemap. There are a number of options, so feel free and choose one that is to your liking. You can also preview each style in the right pane.
![]()
Now, you’ll need to fill the nodemap with all the assossiated data. To do so, click on the "Edit content" tab.
You have three options to populate your nodemap.
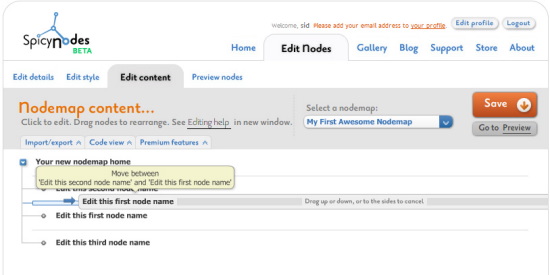
The first, and easiest, is to use the wizard. Changing the order of nodes is as simple as dragging and dropping the node to it’s required location.
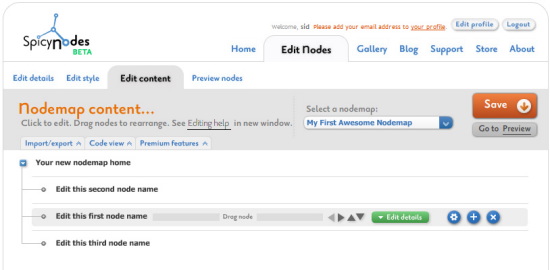
Need to add a node? Just hover on the parent node and click on the + button to add a node.
The second way is to use the SpicyNode syntax to add nodes and connectors as needed. Please refer to the Syntax guide to learn more.
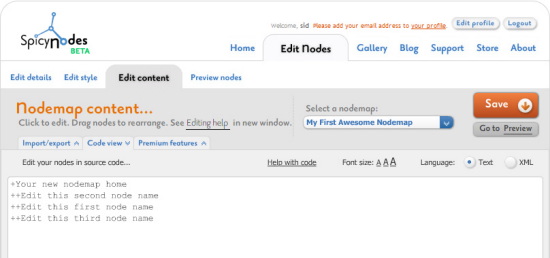
Finally, you can import a nodemap through the uploader provided in the interface. Both text and XML files are allowed.
![]()
Once you’ve finished building your masterpiece, it’s time to finalize everything and get it published. Click on the "Preview nodes" tab to begin.
Next, you’ll be shown a full-size preview of the nodemap you’ve built so far. If you want to make any changes, just click on the "Edit content" tab to make the needed changes.
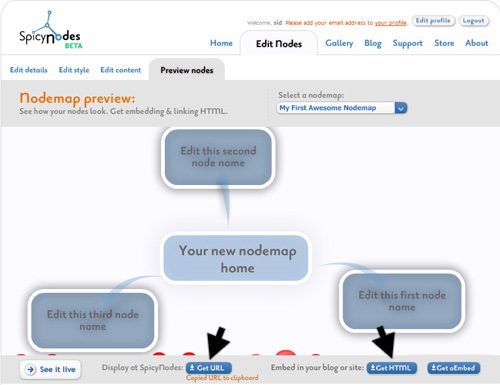
If you’re ready to publish, the easiest way to share your nodemap is by sharing the URL to a hosted version of your map (it will begin with http://www.spicynodes.org/a/ followed by 32 characters unique for your nodemap. Just click on the "Get URL" link to grab your own link, which you then can share with family and friends.
If you would like to embed your nodemap in your own web site, it’s easy. Just click on the "Get HTML" button, and you’ll be given the requisite HTML code you’ll need to include the nodemap on your web page.
![]()
This is just the tip of the SpicyNodes iceberg. SpicyNodes is a powerful engine, allowing a myriad of content types and customization options.
![]()
- Create a new nodemap
- Read the author's or copywriter’s guides for tips on effectively creating and presenting nodemaps
- If you are a developer, check out the developer’s guide

